Installing Radiant In Floor Heating
Important: This post is a very general guide to help you understand the differences in complexity of installing various in floor heating systems. This article DOES NOT replace the instructions that shipped with the product, and we won’t cover all steps or product limitations. Always follow the instructions you receive with the product when installing in floor heating.
With installation of all our electric in floor heating, we recommend you buy and use a Loudmouth monitor during installation. If the wire is damaged during installation, the Loudmouth will sound and alert.
Also, always make sure to check the ohms before installing any of our floor warming systems and again prior to covering with tile or mortar. Never install any in floor heating under cabinets, toilets, stoves, etc. Always allow proper cure time before turning on your system, 14 days from the time you grout on all our systems except slab heat, which is 28 days. Always check your local building codes to make sure you can install the system you are buying and to make sure the system you are purchasing is legal in your area.
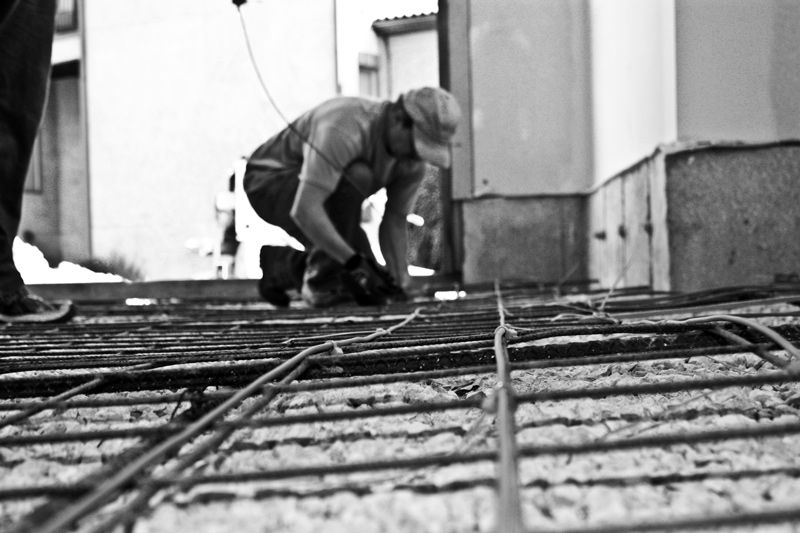
Prior to pouring concrete, you will attach zip ties to rebar at the spacing that is determined by your heat loss calculations. Using conduit, run the cold lead up to the thermostat location to be connected later. Run the probe up another conduit to the thermostat location. I always suggest installing two probes. They are cheap, and if one malfunctions it will save you a bunch of work to replace. Next, pour the concrete. I always recommend using insulation under the concrete when using slab heat to improve efficiency. Pour concrete over the wire. If you are not pouring the concrete, make sure the people who do are careful not to damage the wire in the process. Slab heat can also be used on existing slab by putting down strap, stringing wire and pouring another layer of concrete over the top.
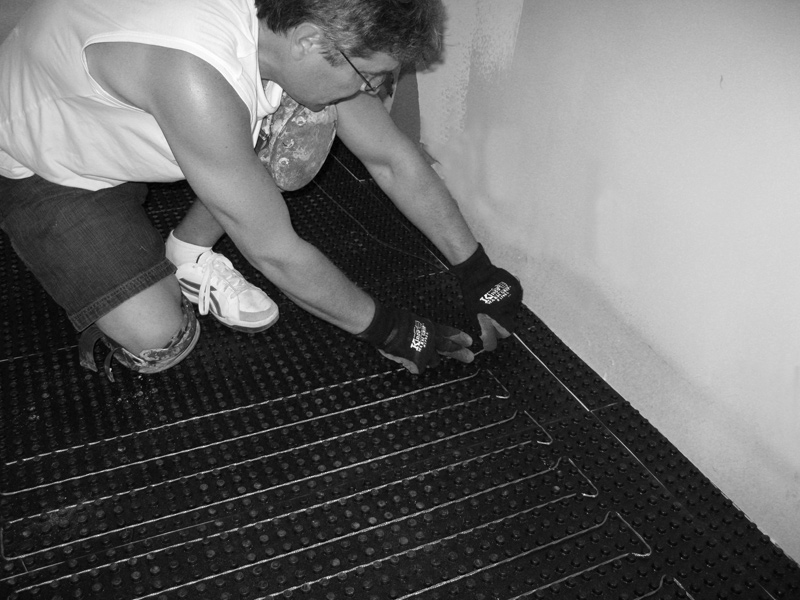
The new RPM-V1 mat can be installed over concrete, wood and backer board using an inexpensive vinyl adhesive. The V-1 can also be used over the top of ceramic tile, vinyl, and natural stone when urethane glue is used. This is the newer version of RPM with vented studs allowing you to trowel vinyl adhesive over the substrate and install the RPM mat directly over without any additional fastener or special glues. Once the RPM is glued down, it’s time to choose your wire spacing. We usually suggest 2.5” when installed over wood and 2” over concrete. If you are planning to use this as a main source of heat for a room you may want to run heat loss calculation to help determine the correct lay out.
Next, you would take your cold lead wire feed up the conduit to thermostat box. Then in a separate conduit, feed your probe wire to thermostat box. Again, I recommend installing two probes as cheap insurance if one malfunctions. Lay the probe in a grove that will not be occupied by wire. String wire as based on your desired layout. If you are using non-coated wire, you will need grommets to hold the wire down. For coated wire, grommets will not be needed. The really cool thing about this system is once the wire is in the channel, it cannot be damaged by people walking on the floor.
Once the wire is placed, it’s time to level the floor with self-leveling underlayment, MasterHeat mix, or a cement-based underlayment to fill the channels. The studs on RPM-V1 mat act as a screed making it very easy to level the cement. Original RPM can be installed on concrete and wood. The only difference on concrete is you would need to use urethane based glue, like Bostic Ultra Set, and on Plywood you would use vinyl adhesive and staple down. This by far is the most user friendly product for a do-it-yourselfer, and pro’s like it for the added protection given to the wire on busy job sites. And if a repair or removal of tile is needed, it can be done without harming the wire.
Keep in mind that RPM replaces the need for backer board. When going over concrete, a cork thermal barrier before the installation of RPM is recommended, especially if the concrete does not have insulation under it. Cork is installed with wood grade urethane and RPM is installed on top of the cork. This makes for a more energy efficient floor because you are only heating the tile and not the entire slab.
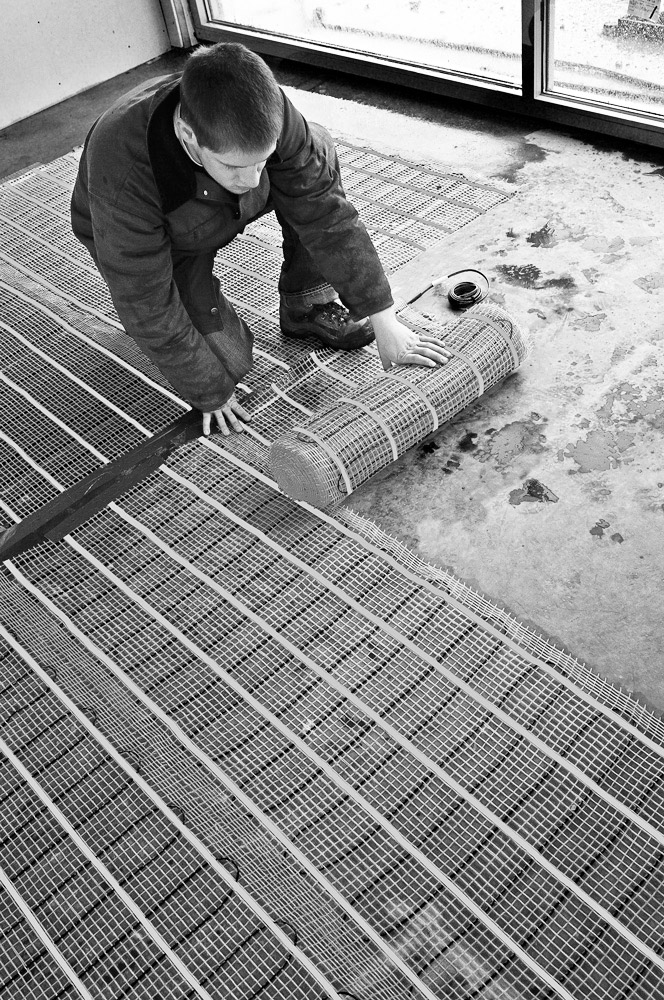
Premade mats make installation pretty simple as the wire is spaced within the mat. With custom mats, you draw your room out to scale with location of thermostat, including any obstructions such as counters, heater vents, stove, etc. We send this to the engineers, and once we receive the layout back, you sign off on it for approval. Then about two week later, your mat arrives. Premade mats are available in a wide variety of sizes if you don’t need a custom one.
Mat should be secured to subfloor with 2-sided tape. I will usually staple it as well, which helps keep the mat flat (NEVER STAPLE WIRE). Run cold lead up conduit to thermostat. In separate conduit, run another probe up to thermostat. I usually run two just in case. At this point, if you are installing tile, you can apply thinset using a special plastic trowel made for floor warming wire. This method can be a bit challenging, and I don’t recommend it for the DIY folks.
If you are not using tile, or prefer to cover the wire prior to installation, you can use thin set, underlayment, or self-leveling underlayment. A lot of professionals do this to make it easier for them to install tile. Covering wire before installation of tile should only be attempted by people who are experienced with troweling and topping compounds. Over concrete, you will need to install cork then using wood grade urethane before installing the mat. This product can go directly over plywood, but I recommend backer board first for tile installations. Installation of this product can be done by a very experienced do-it-yourselfer, but best installed by a professional.
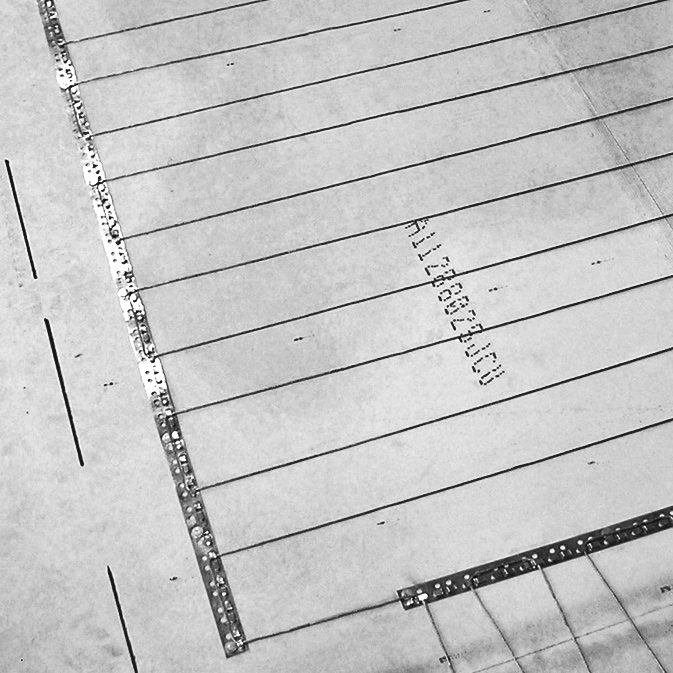
For coated and uncoated wire installed with metal gauge over plywood and backer board, first step is nailing the gauge to the floor. On concrete, we again recommend cork as insulation before installing the wire. Use hot glue or double sided tape to attach the gauge to the cork or concrete. Decide wire layout you want based on area you are warming or if using for primary source of heat. Run the cold lead up the conduit to thermostat box. String the wire based on spacing you have chosen. Leave 5 to 6 inches of spacing between wire and wall. Once you are done stringing the wire, take your probe, and using a separate conduit, run it up to thermostat box. Place probe in between the wire without laying over the wire. Install two so you have a backup. Keeping foot traffic off the wire is very important until it is covered. You should be very careful when walking on cable not to damage it. Do not ever walk on metal gauge as you can pinch and damage the wire.
Once the wire is down, you can set tile using plastic trowel and thinset, however I don’t recommend this since it is hard to get flat floor and wire can be damaged. Ideally you would be pouring self-leveling cement to cover and protect the wire immediately after installation. It also makes for a nice flat floor to install your tile on. You may also use thin set or underlayment to cover wire if you are skilled at leveling cement mortar.
At this point, you’re ready to tile and grout. Connect thermostat, let cure, and you are ready to go. The skill level for this product is professional level. Coated wire must be used in wet area and is harder to damage the uncoated wire. Uncoated wire is less expensive and a little easier to work with but it cannot be used in wet areas.
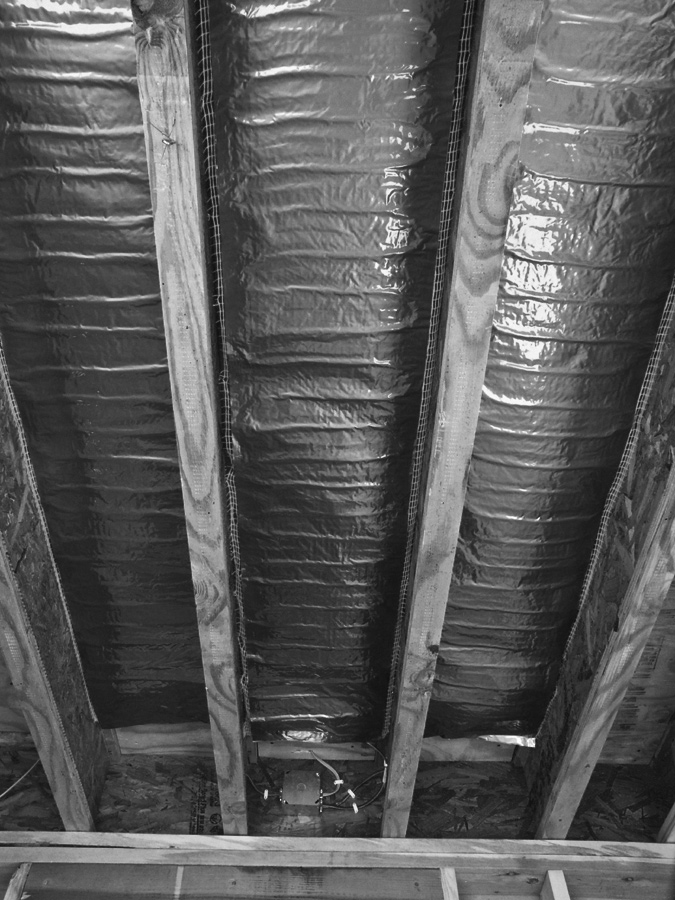
Under Floor heating mats are very easy to install, but you must have clear access to joists. Installation is very simple, as you just staple mat up to floor joist. Connect mats at junction box and install insulation. If you are able to install probe in floor, run up conduit to thermostat. If you are not able to put probe in floor, you can use change thermostat to operate off of air temperature. You may also use a GFI on/off switch. If you do this, floor will operate at max temp. 12 to 15 degrees warmer than if you had a thermostat, depending on floor covering. Under floor systems are relatively easy to install for a more experienced do-it-yourselfer, if you have access to the joist.